Showing posts with label snacks. Show all posts

Wednesday, January 25, 2012

Italian Baba Ghanouj with Balsamic Reduction and Stewed Figs


Or is it baba ghanoug or baba ganush....to my knowledge, there isn't a "right" translation and spelling from Arabic to English and it is often spelled differently everywhere you look. This popular, tangy eggplant dip grew in popularity in the U.S. mostly in the last ten years or so. I think of it as hummus's lesser known sibling. The hummus boom made the garbanzo bean version of this dip wildly popular and I have to wonder, why not eggplant? What made hummus so much more common? The plethora of hummus flavors out there is overwhelming. There is everything from roasted pepper or olive hummus to Buffalo-style hummus and pesto hummus. I have even seen edamame hummus. While these are exciting alternatives to the standard, I see no reason to limit myself to all beans. I love a good batch of baba ghanouj (my preferred spelling) with it's vague smokiness from the roasting, creaminess from the tahini, and bit of acidity on the tongue. I wonder, why can't we change a few seasonings and make flavored baba ghanouj the way some hummus companies and kitchens make flavored hummus?

Traditional baba ghanouj is made with a roasted eggplant (roasted over a flame, if possible, to achieve that smokiness), tahini, lemon juice, and olive oil. To be really traditional, you could add a wee bit of pomegranate molasses, found in Middle Eastern stores, and I love adding toasted cumin seeds and some sweet paprika. That is the classic version--not too far off from what is added to garbanzo beans for traditional hummus.

Versatile ingredients all ready to go!
For my eggplant dip to rival hummus, I am going to roast a medium eggplant with some garlic cloves, add fresh oregano, olive oil, and balsamic reduction drizzled on top in lieu of the pomegranate molasses.  Rather than a taste of the Middle East, we are off to Italy for this one. This is great served with sliced Italian bread, focaccia, or pita. I may even try to scrounge up some dried figs, stew them to soften them and garnish the top with wintery sweetness.

Italian Baba Ghanouj with Balsamic Reduction and Stewed Figs

1 medium eggplant
6-8 cloves garlic, with skins on
2 T extra-virgin olive oil+ 4 T
1/3 c +2 T inexpensive, everyday balsamic vinegar
8 dried figs
2 t freshly squeezed lemon juice
1/2 t chopped fresh oregano, or 1/4 t dried
1/2 t sea salt
freshly ground black pepper

crusty bread, focaccia, or flatbread for serving


Preheat to oven to 350 degrees. Wash the eggplant and coat gently with a tablespoon of olive oil. Place on a large piece of foil that is laid across a baking sheet. Rub cloves of garlic with another tablespoon of oil. Nestle them near the eggplant in the center of the foil and wrap them loosely.

Roast for about 40 minutes, checking after about 25 minutes to check the garlic cloves. If they are very soft before the eggplant, pull them out and let them cool. When eggplant is done roasting, open the foil and also let it cool.

In a small saucepan, cook the balsamic vinegar over medium heat to reduce by 1/2. It is done when it is thick and syrupy. You can go a little over and reduce more, but don't reduce less. Transfer to a bowl.

Without washing the pot, add about 1/2 c water, 2 T balsamic vinegar, and the dried figs. Simmer until figs are very tender and water/balsamic mixture is just about evaporated. Let cool, then quarter the figs.

When eggplant is cooled, slice open and scrape out the insides into a mixing bowl. Mash with lemon juice, oregano, salt, pepper, and olive oil to taste. Add about half of the balsamic reduction and taste, adding and adjusting salt and lemon, as well.

Pour into a low flat bowl to serve. Garnish the top with olive oil, balsamic reduction, and quartered figs. Serve room temperature with warm bread.

Tuesday, August 23, 2011

Mediterranean Bruschetta with Fava Bean Puree


If you are lucky enough to have a market that carries fresh fava beans in season, then be sure to pick some up when you see them. They are typically found fresh in June in the northeast, but are now available in cans and jars. There are even cooked favas in water in a vacuum seal pack at Whole Foods in the produce section so, while fresh is best, your fava season can be extended if you love them as much as I do. Fava beans have an earthy, green flavor that hold their own as an hors d'eouvre or are often seen sauteed and as an accompaniment to fish or chicken. They are fresh, bright green, and addictive.

Drain and rinse.
I bought a huge batch this spring and shelled, peeled (the tender, beany outer skins), blanched, and froze a bunch to extend my fava season. Unlike canned, jarred, or dried, they kept their perky green color and taste so fresh I thought they should be showcased on a baguette. Served with zucchini pancakes and roasted tomato sauce, this is a fantastic late-summer vegetarian/flexitarian meal or it's perfect as an appetizer.


Mediterranean Bruschetta with Fava Bean Puree

3-5 large cloves garlic, unpeeled
Cool roasted garlic before peeling.
extra-virgin olive oil (about 1/4 cup total)
1 1/2 cups cooked fava beans

Tuesday, June 28, 2011

Fried Green Tomatoes

Make it elegant and serve with creme fraiche and pea shoots.

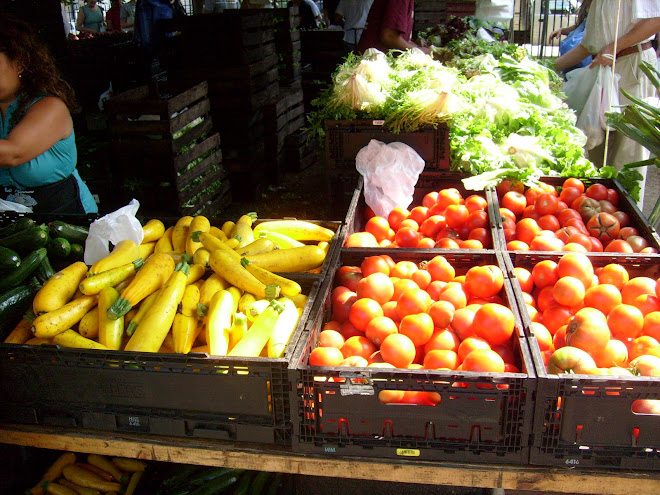
One of the great things about shopping for produce at the greenmarket versus the supermarket this time of year is the variety and abundance. Right about now, the purple, yellow, and red carrots are being pulled up for market and the varieties of summer squash are vast, ranging in color from pale, pale yellow to deep, dark green. Things you may have never even seen before are available and waiting to be tried. Soon there will be big bunches of dill flowers and hundreds of peppers in every shape, size, and color.
Commune cuisine at its finest!
This past weekend I was reminded of one of my Southern-inspired summer favorites--fried green tomatoes. The hard green tomatoes piled in a crate looking meek and lonely next to the fancy and exotic heirlooms wooed me with their simplicity and humble presentation. I filled a bag right away. Fried green tomatoes are a symbol of summer sun and relaxation to me. Served with some kale, and smoky vegetarian pinquitos beans and rice, these sour and savory morsels don't last long at my table.


Fried Green Tomatoes

10-12 firm, green underripe tomatoes (ripe, green heirlooms are watery and don't come out the same)
1 1/2 c yellow cornmeal
1 c whole wheat or oat flour (or corn flour for gluten-free)
One of those little buggers began to ripen overnight!
1 T Cajun seasoning (opt.but good!)
1 t garlic powder
1 t sweet paprika
1/2 t sea salt
1/4 t freshly ground black pepper

1 egg (opt.)
1 1/2-2  cups almond milk, soy milk, milk, or water

expeller-pressed canola/sunflower/safflower oil for frying (a cup or so)


I fried it anyway.
Wash and core tomatoes and slice into rounds about 1/3" thick. Set aside. In a shallow bowl or on a plate, combine cornmeal, flour, Cajun seasoning, garlic powder, paprika, salt, and pepper.

If using egg, whisk together egg with liquid in a medium bowl. Start with 1 1/2 and as you dredge and fry, add more liquid if you are running low. Without egg, just put the full 2 cups liquid in a bowl.

Heat a 1/2 inch of oil in a frying pan and set up a plate with paper towels for draining. When a pinch of flour sizzles, oil is ready. Dip tomato slices in liquid and dredge in the cornmeal mixture, creating a nice, thick layer. Place in the oil to fry. Continue until pan is full, but not overcrowded.

Fry for about 4 minutes, flip, then fry about 3 minutes more. Transfer to paper towels to drain and season with salt while hot. Fry remaining slices in batches. Dredging the upcoming batch while a batch is frying will save time.

Tranfer drained tomatoes to a warm oven, uncovered to keep hot.

Serve with hot sauce, ketchup, creme fraiche and pea shoots (my favorite), or mustard. They are great as sandwiches the next day, too.

Thursday, March 24, 2011

Tapas Time--Artichoke-stuffed Tomatoes

eggplant deliciousness on bread topped with a quail egg and chive

I'm always thrilled when someone wants to go out for tapas.  I love tapas.  The various small bites of flavor are captivating and I love the entire experience.  I love having a huge variety and getting just a bite of everything.  I love many different tastes at one sitting.  Tapas are an excuse to have a bunch of really great snacks and call it a meal.  The process, the slow-down, the savoring of each bite, and the wine thrill me to no end.  Apparently tapas began in Andalusia  as something to place over your drink to keep the bugs out. There was always one bite served with every drink and the tradition evolved into a cultural experience.  Using the freshest, most seasonal stuff around at the moment, tapas can be anything prepared simply and seasoned properly.  Plating and presentation are important and go along with the slow eating, appreciation of each bite, and the savoring of the experience.

Fun for couples or groups of any size, tapas-style dining changes the pace of things and gets us to sit back and enjoy.  The Spanish dining philosophy of 'Eat When You Drink, Drink When You Eat' isn't lost on me.  I love following this rule and do it whenever possible or practical. 

Last weekend, when good friends were visiting from D.C. and we were needing a good spot to catch up, we did just that.

fresh anchovies, briny, sweet, steamed to perfection, and dressed with lemon

On a Friday night in Greenwich Village, we were expecting a long wait when we saw the jam-packed tapas bar over-flowing with diners.  As luck would have it, our 30-minute wait became about 10 minutes and we were seated at a tall 3-top in the front with a perfect view of the Bleecker St. bustle. 

the remains of my seared tuna and a cheese stick to beat all cheese sticks. . .artisanal Spanish cheese, breaded and fried
My friend, another Katie, wisely ordered everything from the specials board first.  We then  revisited the menu for a few last nibbles.  Kurt ordered the wine, the details of which I have lost, but it was fantastic, too.  Maybe a tempranillo?  Nonetheless, everything was delicious and we left happy, but not too stuffed, which is another perk of having all small bites.

Here is a recipe that I made up inspired by a traditional tapas recipe of stuffed tomatoes.  The old version is filled with breadcrumbs and aioli and are concasse'd (blanched to remove skin).  I like the skin and wanted to add the artichokes in as flavor perk. I kept going by adding almond meal and marcona almonds on top until Voila!  Artichoke-stuffed Tomatoes...


Artichoke-stuffed Tomatoes


1 pkg Campari tomatoes (or about 8-10 golf ball-sized tomatoes), cherry tomatoes could be a substitute
Sea salt and freshly ground black pepper
4 T extra-virgin Spanish olive oil
1/4 cup minced onion
3 artichokes, carved down to the hearts and squirted with lemon juice and diced (or 3 canned or frozen artichoke hearts, diced)
1 T dry white wine
1/3 cup whole grain bread crumbs
3 T almond meal or finely chopped almonds
3 T mayonnasie or Veganaise, whatever your preference
2 T freshly squeezed lemon juice
2 T freshly minced parsley
1/2 t Spanish paprika (sweet or hot)
8-10 Marcona almonds (or 8-10 regular almonds, soaked for a minutes in olive oil and a bit of sea salt)


Wash, dry, and prepare your tomatoes, by slicing off just the tops and setting them aside.  Gently scoop out seeds and pulp from the tomatoes with a small melon baller or a grapefruit spoon.

Preheat the oven to 400 degrees.

Oil a baking dish and arrange tomatoes upright in dish.  Lightly salt and pepper them and set aside.

In a saute pan, heat oil and cook onion for 2 minutes on medium.  Add garlic, stir one minutes, then add diced artichoke hearts and wine.  Cook on medium for 10-12 minutes, if using canned or about 20 minutes, if using fresh. When tender and fragrant, turn the heat up a little bit and add breadcrumbs and almond meal.  Season with salt and pepper. Let cool for a few minutes, then add mayo/Veganaise, lemon juice, and parsley.  Taste and adjust seasonings.

Carefully  fill tomatoes using a small spoon and mound filling a little over the top, if possible.  Top each with a light dusting of paprika and sink an almond into the top. 

Bake, uncovered, for about 25 minutes, or until browned and bubbly.  Beware to remove them if the almond begins to burn or if the tomatoes begin to collapse.

Let cool for 5 minutes and serve!

Tuesday, April 6, 2010

Roasted Artichoke Pesto Bruschetta with Creme Fraiche and Chives


Tissue Paper and Baby Sock Flowers for the Shower

Well, it was a fun-filled weekend with the warm weather and busy-ness of our trip to CT! We celebrated birthdays, had a baby shower for my lovely sis-in-law, celebrated Easter, and visited with an old friend. It was a blast and the shower was a success! We offered a homemade, seasonal hors d'oeuvres for guests to munch on arrival and it turned out great!

Featuring my favorite spring vegetable, the artichoke, I made it in advance and had no problem setting it up quickly. This would be a great snack, soup accompaniment, hors d'oeuvre, or potluck addition, so try it out and don't eat it all before the guests arrive!


Roasted Artichoke Pesto Bruschetta with Creme Fraiche and Chives

6 large artichokes (you can use frozen or canned, but I love them fresh!)
2 juicy lemons
sea salt
freshly ground black pepper
1/4 tsp finely minced garlic (for roasting), plus 1 large clove garlic (for blending into pesto)
extra-virgin olive oil

1/2 cup pine nuts
1/2 cup parmigiano reggiano, chopped into chunks or smallish pieces
1/2 tsp sea salt
1/4 cup extra-virgin olive oil
2 T freshly squeezed lemon juice
1/2 tsp dried oregano

1 fresh baguette, sliced into 1/3" thick slices
chives and creme fraiche for garnish


FOR THE PESTO:

Preheat oven to 375 degrees.

Cut 1/4 inch from the top of one artichoke, then slice away the tough leaves. Scoop the scary hairy stuff from the center and squeeze with lemon juice and a pinch of sea salt. Transfer them to a baking sheet. Continue with remaining artichokes. Be sure to do each artichoke individually and get lemon juice on it asap--they oxidize and turn a scary brownish color quickly.

When they are all prepped, add freshly ground black pepper, garlic, and a dash of extra-virgin olive oil. Rub together and distribute seasonings with clean hands and roast, uncovered, for 30-40 minutes, until browned and tender. Let cool for a few minutes while you toast the pine nuts, watching them closely.

Toast pine nuts for 5-10 minutes, until just fragrant and beginning to color.

Place artichokes in a food processor with large clove of garlic, toasted pine nuts, parmigiano reggiano, sea salt, lemon juice, and oregano. Blend until smooth. Mixture will have some texture, but just make sure garlic and artichokes are blended. Chill until 2 hours before serving, if you are making it ahead. Otherwise, serve slightly warm or room temp.

TO SERVE

Spread 1-2 Tbsp of pesto onto baguette slices. Dot each piece with 1/4 tsp creme fraiche and a little snip of chives.


Tuesday, March 23, 2010

Garlicky Tzatziki Sauce


The branches are bare, but the sun comes out every few days!

Happy Spring, Everyone! It's not really cold anymore, but it's not really warm yet either. This time of year is a little confusing as far as eating goes. Salads sound good, but with the rain and the chill in the air, it's a little early to be satisfied grazing on just raw greens. I have been doing some back to basics cooking lately: Plain brown rice, steamed veggies, simple sautes and soups. It's easy, but admittedly gets a little boring. Here's a great tzatziki sauce recipe to help jazz things up without adding a ton of prep time, but adding a ton of flavor!

Indulge in this garlicky Greek classic on warmed flatbread, on leftovers, with grilled or steamed veggies, or as a dip for raw veggies, bread, or kebabs. If you want to get really crazy, get some really nice feta, olives, and bread and you have yourself a feast! Kali Oreksi! (that's kind of like Bon Appetit in Greek)


Tzatziki

1/2 cucumber (preferable organic, if not organic find an unwaxed one because you eat the skin)
6 oz Greek yogurt
3 cloves garlic, grated on a microplane grater (or finely minced)
1/4 cup finely chopped onion (use red for a little color!)
1/2 tsp sea salt
freshly ground black pepper to taste
1 Tbsp freshly chopped mint
1 Tbsp freshly chopped dill
1 Tbsp freshly squeezed lemon juice

Friday, February 26, 2010

Stilton: Britain's Historic Blue

Close-up of a cylinder of Stilton

Stilton, both a sharp creamy cheese and the name of a town in England, has, little by little, captured the attention of the whole world with it's piquant, moldy, creamy delightfulness. It is versatile and pairs great with wines, ales, fruits, veggies, and meats. Stilton is made in a somewhat chilly climate and so is a natural winter hibernation treat.


Like Champagne in France, the government of England oversees the use of the name Stilton so not just anyone can make a blue cheese and call it Stilton. It is an EU Protected Food Name and has its own certification trademark. In fact, the government has approved only six producers as Stilton cheese makers and it can only be produced in three counties.

The region around the town of Stilton has been producing what they call Stilton, but the actual cheese has changed and evolved over the last four centuries. As early as the late 17th century, there is documentation of this historic cheese's production and popularity. It is unclear if Stilton always had blue veins coming out from the center or was sometimes a white aged cheese (there is still such thing as 'white stilton' but it is not the traditional Stilton we are talking about). The cheese has evolved and today is guaranteed to be produced according to a legally binding recipe. It is also guaranteed to have been produced within the three government-approved counties: Derbyshire, Leicestershire, and Nottinghamshire.

Stilton cheese is one of winter's great pleasures. A loyal follower suggested I do a posting involving mulled wine, stilton, port/winter comfort foods. Stilton, to me, is a great starting point. Starting with the star of the show and choosing a "supporting cast" of wintry accompaniments is a guaranteed win for comforting snacks!

Pick up a nice piece of Stilton at a reputable cheese shop and head to the wine shop for a deep red, port, or even a malty ale. Pair with your favorite chutney, winter fruit, and bread and let the wind blow outside.


Some thoughts on Stilton:

On a cheeseboard, serve at room temperature to enjoy full flavor and texture (68 F, 20 C).

Like a true Brit, serve with Mango Chutney and Port.

Unlike many artisan cheese, Stilton freezes very well.

Stilton gets melty when warm and goes great with potatoes, meat, vegetables and crumbles great on salads.

Some accompaniments I like and suggest are fresh or dried figs, dates, quince jam, fig preserves, roasted kumquats, mango chutney, and apple-raisin chutney (try Stonewall Kitchen Farmhouse Chutney).


Beef Brisket Burger with Stilton, Chips, and Cornichons!


An informative site on the cheesemaking process, the producers, and some very English recipes:
http://www.stiltoncheese.com/

So whether or not you are snowed in, consider enjoying some stilton, bread, and wine this weekend. The winter won't last forever, even though sometimes it feels like it. There are only so many more weekends to enjoy these hearty, decadent eats before the sun reappears and we are out greenmarket-ing for salsa fresca ingredients.

Cheerio!

Wednesday, February 10, 2010

Cafe au Lait and Beignets


snowy, snowy Brooklyn

If you are anything like me, you are feeling lucky today. The snow is coming down and lots of things in NYC have been cancelled. I love an impromptu day of nothing. I like to catch up on reading and feel no pressure to hurry up or get to this place or that. Usually on a day like this, I like to do a bit of organizing and often a bit of cooking as I putter around the apartment peering out at the snow coming down.

It's a great day to treat yourself to a comforting cafe au lait with beignets. They take awhile to make, but are pretty straightforward. Start them now and you will have beignets and coffee for your afternoon snack. You probably have all of the ingredients on hand and Fat Tuesday is next week...take advantage of the extra time today and enjoy being snowed in. If you are a Saints fan, you could make these in honor of the Superbowl win. In general, New Orleans-y food seems fitting right about now. You won't have the whole experience of sitting at Cafe du Monde on a sweltering day with marching band sounds playing in the background, but you can turn the heat up and throw on some music, if you are so inclined. You won't regret that first steamy bite of a classic Cafe du Monde-style beignet!

Here is a scratch recipe for beignets. According to the author at NolaCuisine.com, it beats the Cafe du Monde mix by a lot. I believe him. Let's try it, shall we?


New Orleans Style Beignet Recipe
**These take awhile, so start them well ahead of time.**
Makes about 2 dozen

1 Envelope Active Dry Yeast
3/4 Cup Water (110 degrees F)
1/4 Cup Granulated Sugar
1/2 tsp Salt
1 Beaten Egg
1/2 Cup Evaporated Milk
3 1/2 – 3 3/4 Cups A.P. Flour
1/8 Cup Shortening
Vegetable Oil for Frying
Powdered Sugar in a shaker or sifter

Combine the Yeast, Water, and Sugar in the work bowl of a stand mixer fitted with a dough hook (You could also make this in a food processor, or the old fashioned way, by hand). Let this sit until frothy, about 5 minutes, then add the Salt, Egg, and Evaporated Milk.

Mix on low speed, then add half of the flour until it starts to come together, then add the shortening. When the shortening is incorporated start adding the remaining flour, a little at a time until most of it is incorporated. At this time I always turn the dough onto a floured bench to finish by hand, just like when I make bread; it’s a touch thing. Knead the dough adding just enough flour as necessary to make a non-sticky, smooth dough.

Place the dough into a large oiled bowl, loosely cover and let rise. After the dough has doubled in bulk, punch it down and turn it onto a floured surface and roll out into a rectangle that is about 1/2″ thick. With a very sharp knife working at a diagonal to the rectangle, cut into 2″ wide strips. Now cut into diamond shapes by making diagonal cuts in the opposite direction. Place the Beignets on a floured baking sheet to let rise about 40 minutes in a warm place (I place them in a barely warm oven).

When the Beignets have risen, heat 2-3 inches of vegetable oil in a large saucepan to 350-360 degrees. Place 2-3 Beignets into the hot oil at a time, being careful not to smash or deflate them. When they are golden brown, flip them over until golden brown on the other side (They go pretty quickly so start checking them right after they go into the oil). Remove to paper towel lined plates to drain. Serve hot topped with plenty of powdered sugar (because the dough doesn’t contain much sugar, you will want a lot!). Best served with Cafe au Lait. Enjoy!


Cafe au lait: In French, it means coffee with milk. In New Orleans, it means strong chicory-infused coffee mixed 50/50 with scalded milk and served in a wide bowl-type mug.

The easiest way to do this is brew Cafe du Monde coffee, which is readily available in supermarkets, not just in New Orleans anymore. If you don't have any at home and they don't have any at the corner deli, just brew a nice, strong pot of coffee. Pour some milk (*or soy milk or almond milk) into a small pot and scald it, which means almost bring to a boil or bring just under a boil. If you are a perfectionist, this means 170 degrees F, but I never check. Then pour the milk and the chicory coffee together in a wide mug.

*If you use milk alternatives, be sure to pour it through a fine sieve on it's way into the mug, because soy milk/rice milk/almond milk-type things tend to curdle when heated--it's perfectly fine, just strain it.


Bon Appetit, Mon Cher!

Sunday, January 17, 2010

Sun-dried Tomato Hummus with Whole Wheat Pita Chips


It's a good day for hibernating, watching movies, and munching. Here is one of my favorite homemade snacks for a rainy, chilly weekend.

The chips are super easy and taste so much better than the store-bought kind. The hummus is versatile and can be made spicy with a little cayenne or hot sauce or freshened up by adding in fresh grape tomatoes and red onions, then topping with finely chopped cucumber or fresh herbs.


Whole Wheat Pita Chips

4 Tbsp extra-virgin olive oil
juice of 1 lemon
1 1/2 tsp sea salt
1 clove minced garlic
1 package pocket-style, whole wheat pita bread
paprika

Preheat oven to 325 degrees.

In a large mixing bowl, whisk together olive oil, lemon juice, salt, and garlic. Set aside.

Cut a pita in half. Then cut each half into 3 triangles of approximately the same size. Peel each triangle apart into 2 thin pieces. Continue to do this with all eight pitas. When you have prepped all of your chips, transfer them to the mixing bowl with olive oil mixture. Using clean hands, toss gently together so the pitas are all coated fairly evenly.

Line up in a single layer on a baking sheet or two. Sprinkle paprika lightly over so each piece has a little color. Bake, uncovered, for 25 minutes. Toss chips from the corners into the center and from the center to the outside edges so they are all toasting evenly. Toast about 25 minutes more. Watch them closely. Depending on your oven, the weather, and the freshness of your pita, they may be done quickly or may need fifteen more minutes.

When chips are mostly dry, but not dark brown, turn oven off and leave chips in. Let oven cool with oven door closed and chips in for about an hour. Serve right away with hummus or let cool completely and store in an airtight container for up to two weeks.

While they are toasting, make some hummus!


Sun-dried Tomato Hummus

1 can chickpeas, drained
2-3 Tbsp fresh lemon juice (or more, as needed)
1 T minced garlic
1/4 tsp ground cumin
1/2 tsp dried oregano
1/2 cup tahini
1 tsp sea salt
extra-virgin olive oil
1 10-12 oz jar marinated sun-dried tomatoes
sweet paprika


Combine chickpeas, lemon juice garlic, cumin, and tahini in a food processor. Puree until very smooth, adding 2 or 3 tablespoons of olive oil as you blend.

When mixture is very smooth, add sun-dried tomatoes with their marinade. Pulse until they are almost blended, but there are still a few small pieces distributed throughout.

Taste and season with salt, lemon, and olive oil, as needed. With a spatula, scrape out into a serving bowl. Drizzle with olive oil and garnish with a healthy dash of paprika. Serve with pita chips and raw veggies.

Saturday, December 12, 2009

Apple Blueberry Coffee Cake Muffins


After a late night, I woke up this morning so hungry. With nothing much to eat in the house, I decided to use up a bowl of blueberries that were lying around and make something to welcome a sunny, but cold Saturday. I added a diced apple and the blueberries to a muffin recipe and voila! The moist fruit turned this healthy muffin recipe into a gooey, delicious coffee cake. The streusel topping was an afterthought, but really makes it.

Apple Blueberry Coffee Cake Muffins

1 apple
1 ½ c ww pastry flour or barley flour
½ c turbinado sugar
2 t baking powder
½ t baking soda

½ t sea salt
2 eggs (Egg-Replacer works)
2 c applesauce
2 t vanilla extract
1/3 c rice milk
2/3 c maple syrup

1 cup blueberries (fresh or frozen--I like fresh)

Streusel Ingredients:
1/4 cup flour
1/4 cup turbinado sugar
dash of cinnamon
3 T melted butter

Peel and core the apple. Cut it into a medium dice (about blueberry-size pieces).
Place in a pot with about 1/2 cup water and simmer until tender, about 10 minutes. Drain.

Oil about 16 muffin cups or line with paper muffin cups and preheat oven to 375 degrees. (I know it's weird, but that's just how the count turned out--You could just do 12 and make a small loaf instead)

Combine flour, turbinado sugar, baking powder, and baking soda in large mixing bowl.

In a smaller bowl, whisk together salt, eggs, applesauce, vanilla, rice milk, and maple syrup. Whisk until uniform. Add berries and apples.

Make a well and scrape into dry mix. Gently fold together until just blended. Spoon into muffin cups.

Combine streusel ingredients in a small bowl and combine with a fork. Mound it over the top of each muffin.

Bake for about 20 minutes, or until just firm in the center.


Saturday, November 7, 2009

Buttermilk Pumpkin Muffins


A November weekend is the perfect time to hit the greenmarket and bake some pumpkin muffins. Here is a moist and gooey recipe featuring buttermilk and maple syrup. If you want to keep it healthy, eat them as is or get crazy and top with a batch of cream cheese frosting for a special treat.

**Time to order your turkey from the greenmarket, if you haven't already done it!** Once you go greenmarket, you won't ever go back to those yellowish frozen blobs. Don't wait! If you aren't sure how, contact me and I will hook you up with the turkey people!


Buttermilk Pumpkin Muffins
makes a fat baker's dozen

1 ½ c ww pastry flour
¼ c turbinado sugar
2 t baking powder
½ t baking soda
½ t sea salt
½ t allspice
½ t cinnamon

2 eggs (Egg-Replacer works)
1 ½ cups pumpkin puree (peeled, steamed, pureed or canned--as usual, fresh is best)
2 t vanilla extract
¾ c buttermilk
2/3 cup maple syrup (grade B is best for baking, but any of the real stuff will do)

Oil 12 muffin cups or line with paper muffin cups.
Preheat oven to 400 degrees.
Combine flour, turbinado sugar, baking powder, and baking soda in large mixing bowl.

In a smaller bowl, whisk together salt, cinnamon, allspice, eggs, pumpkin, vanilla, buttermilk, and maple syrup. Whisk until uniform.

Make a well and scrape into dry mix. Gently fold together until just blended. Spoon mixture into muffin cups. Sprinkle the tops with turbinado sugar. If you are planning to frost them, skip this step.

Bake 20-25 minutes, or until springy in the center. Let cool.


Frost lightly with cream cheese frosting.


Cream Cheese Frosting

1 stick unsalted butter, softened
8 oz cream cheese, softened
2 t vanilla extract
2-3 cups powdered sugar

Cream butter and cream cheese with electric mixer and add vanilla.
Add powdered sugar until you reach the desired sweetness/consistency.

**If they are really messy, chill for awhile to firm up frosting.